One common frustration among Tesla owners is the issue of their Tesla Gen 3 Wall Connector not connecting to Wi-Fi.
By the end of this guide, you’ll be equipped with the knowledge to troubleshoot your Tesla Gen 3 Wall Connector’s Wi-Fi connectivity issues, ensuring that you can seamlessly monitor your charging progress, receive notifications, and adjust settings using the Tesla mobile app.
Say goodbye to the frustration of a non-responsive Wi-Fi connection and embrace the potential of uninterrupted charging experiences.
How to Fix Tesla Gen 3 Wall Connector Not Connecting to Wifi Issue?
Step 1: Check the LED status of your Wall Connector
The LED on your Wall Connector indicates the status of the device and the charging process. Depending on the color and pattern of the LED, you can identify the problem and take appropriate action.
If the LED is solid green, it means that the Wall Connector is ready to charge and has a Wi-Fi connection.
If the LED is pulsing green, it means that the Wall Connector is broadcasting its own Wi-Fi network for commissioning or troubleshooting. You can connect your phone or tablet to this network and access the Wall Connector settings through a web browser.
If the LED is solid blue, it means that the Wall Connector is charging your vehicle and has a Wi-Fi connection.
If the LED is pulsing blue, it means that the Wall Connector is charging your vehicle but does not have a Wi-Fi connection.
If the LED is solid red, it means that there is a fault with the Wall Connector. You should contact Tesla Support for assistance.
If the LED is pulsing red, it means that there is a fault with the vehicle or the charging cable. You should check your vehicle and cable for any damage or obstruction.
Step 2: Connect your phone or tablet to the Wall Connector’s Wi-Fi network
If your Wall Connector does not have a Wi-Fi connection, you can try to connect it manually by following these steps:
1. Go to your circuit breaker panel and turn off the breaker for five seconds. During this time, note the amperage for the breaker your electrician has installed for the unit.
If the circuit breaker is not accessible, press and hold the cable handle button for five seconds to prompt the Wall Connector to broadcast its Wi-Fi signal. Once all the lights turn on, you can release button 1.
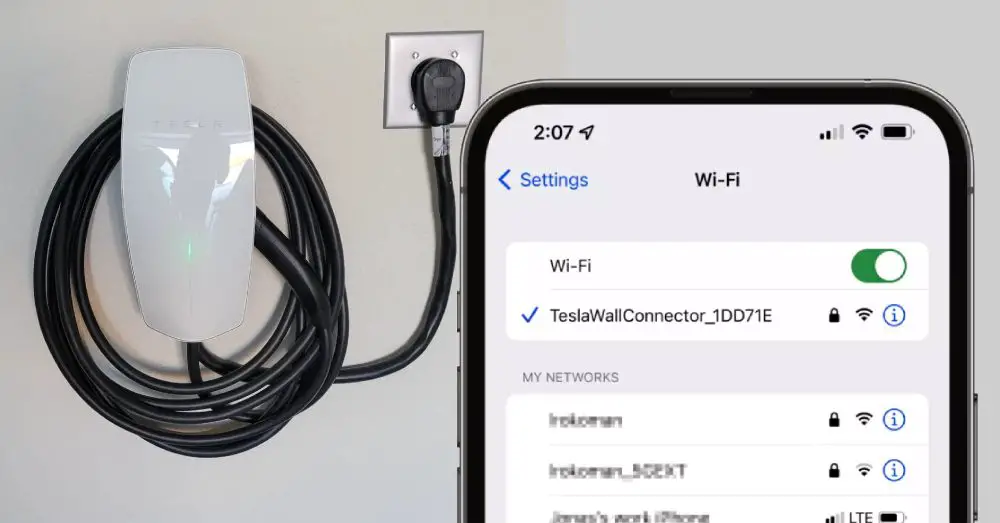
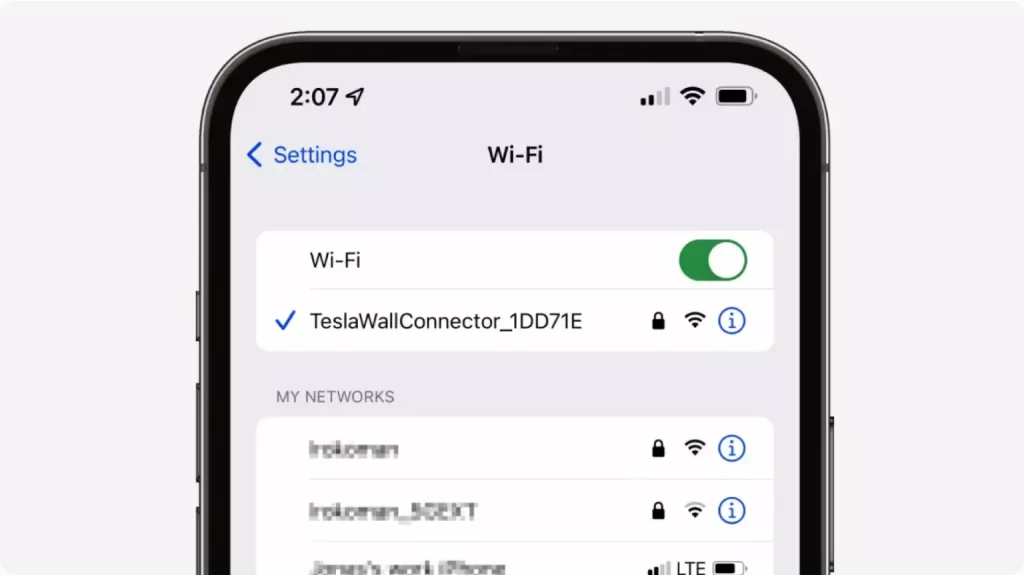
2. Ensure that your Wall Connector is broadcasting its Wi-Fi network. It should display a pulsing green LED and have a network name like TeslaWallConnector_XXXXXX.
3. On your phone or tablet, go to Settings and find and select the Wall Connector’s Wi-Fi network. Enter the 12-digit WPA2 password on the front of the Wall Connector Quickstart guide to connect your device to the Wall Connector1.
4. Open a web browser on your device and go to 192.168.92.1. This will take you to the Wall Connector settings page 2.
Step 3: Configure your Wi-Fi settings on the Wall Connector
Once you are on the Wall Connector settings page, you can configure your Wi-Fi settings by following these steps:
1. On the main page, tap on Wi-Fi Settings.
2. On the next page, tap on Scan Networks.
3. Select your home Wi-Fi network from the list of available networks.
4. Enter your home Wi-Fi network password and tap on Connect.
5. Wait for a few seconds until you see a confirmation message that says “Connected”.
6. Go back to your device’s Settings and disconnect from the Wall Connector’s Wi-Fi network.
7. Check if your Wall Connector has a solid green or blue LED, indicating that it has a Wi-Fi connection.
Step 4: Troubleshoot Common Issues
If you still have problems with your Wi-Fi connection after following the steps above, you can try some of these common troubleshooting tips:
1. Make sure that your home Wi-Fi network has a strong signal near your Wall Connector. You can use a Wi-Fi analyzer app on your phone or tablet to check the signal strength and interference levels.
2. Make sure that your home Wi-Fi network password is correct and does not contain any special characters or spaces.
3. Make sure that your home Wi-Fi network does not have any firewall or security settings that may block or limit the connection of your Wall Connector.
Step 5: Update your Wall Connector firmware
Your Wall Connector may need a firmware update to improve its performance and functionality. You can check and update your firmware by following these steps:
1. Connect your phone or tablet to the Wall Connector’s Wi-Fi network as described in step 2.
2. Open a web browser on your device and go to 192.168.92.1/update or 192.168.92.1/service.
3. Select ‘choose file’ and then upload the Wall Connector firmware file. You can download the latest firmware file from Tesla’s website1.
4. Click ‘upload’ and wait for up to one minute.
5. Confirm that the firmware update was successful by checking the firmware version on the main page 2.
Step 6: Contact Tesla Support if the problem persists
If none of the steps above resolve your Wi-Fi connection issue, you may need to contact Tesla Support for further assistance. You can do so by following these steps:
- Connect your phone or tablet to the Wall Connector’s Wi-Fi network as described in step 2.
- Open a web browser on your device and go to 192.168.92.1/diagnose.
- Log in to your Tesla Account and complete a few preliminary troubleshooting steps.
- If your issue still isn’t resolved, you will be connected with a technical support agent.
- Have your Tesla part number and Tesla serial number available for reference.
How to Connect Tesla Wall Connector to wifi without any error?
1. Ensure the wall connector is in commissioning mode. This can be done by either turning off and on the breaker or pressing and holding the button for 5-10 seconds until all the bars light up and the blinking green light appears.

After that, the green LED indicator will go dark to dim the beam for a while. Within 5 minutes, it’ll broadcast the wall charger signal and give Wi-Fi access point.
2. No matter if you are using iPhone or Android device, turn on the Wi-Fi network like you usually do. Just go to Settings > Wi-Fi > slide the slider to turn it on.
PRO TIP: Make sure to put your phone on airplane mode and close phone’s cellular data before connecting to Tesla WC wifi.

3. Next, you should wait for your phone to detect the Wi-Fi network name of the wall charger, which should be TeslaWallConnector_XXXXXX. If for some reason the network does not appear in your phone’s available Networks list, you may need to flip the circuit breaker switch from ‘On’ to ‘Off’ and then wait a few seconds before switching it back to ‘On’.
4. Once you find it simply mark it to the network. Click on it and a prompt will come telling Enter Passwords. Write the 12 digits of the passcode that you’ll find in the front of the Wall Connector Quick Start Guide.

Give your phone a few seconds to connect to the wall charger.
PRO TIP: If your phone displays an alert message saying “Wi-Fi is not connected to the internet”, don’t worry. Simply “Keep Device Connected” to the wall charger network as this is normal for the setup process.
5. To begin setting up your Tesla wall charger’s Wi-Fi connection, you have two options. You can either scan the QR code displayed on the wall charger using your phone’s camera, or you can enter the IP address (http://192.168.92.1) into a trusted web browser. Choose the method that works best for you.

PRO TIP: Make sure to search the URL in the web browser (Google/safari), not in a searching app. It’s worth noting that sometimes the wizard’s front page may not load correctly. If this happens, make sure you enter the correct URL (http://192.168.92.1/wifi) and then click the back button at the bottom to proceed with the Wi-Fi setup process
6. Follow the on-screen prompts to set up the Wi-Fi, including selecting your home Wi-Fi network and entering the password.
7. Check for software updates, adjust the breaker setting if needed, and set up access controls as desired.
8. Enable power-sharing if desired, which will allow for load balancing if multiple wall connectors are connected to the same circuit.
9. Ensure your phone or device does not auto-reconnect to other Wi-Fi signals during the process.
10. Once complete, exit commissioning mode and the wall connector will be ready to use with Wi-Fi.
How to Fix the Tesla wall connector not connecting to wifi?
1. Check the Wi-Fi settings
It might be possible that there is an incompatibility issue between WPA3 and the Tesla Wall Connector when used in conjunction with Google WiFi.
If your Wi-Fi network is working correctly, and the signal strength is strong, then the issue might be with your Wi-Fi settings. Make sure that your Wi-Fi network is using the correct security settings, such as WPA2-PSK.
2. Reset the wall connector
To reset a Tesla Wall Connector, you can follow these steps:
1. Turn off the circuit breaker that powers the Wall Connector.
2. Wait for about 10 seconds and then turn the circuit breaker back on.
3. Once the Wall Connector restarts, the LED light will blink green.
4. If the LED light does not blink green, press and hold the reset button on the Wall Connector for about 10 seconds until the LED light blinks green.
3. Update the Firmware version
If your Tesla Wall Connector is running an outdated firmware version, it might not be able to connect to Wi-Fi.
Make sure that your Wall Connector is running the latest firmware version by checking the Tesla mobile app. If there is a firmware update available, install it and see if the issue is resolved.
Conclusion
A Tesla Wall Connector not connecting to Wi-Fi can be frustrating, but there are several steps you can take to troubleshoot and resolve the issue.
Start by checking your Wi-Fi network, signal strength, Wi-Fi settings, and firmware version, and restarting your Wall Connector and router. If none of these steps work, contact Tesla customer support for further assistance.
With these troubleshooting tips, you’ll be able to connect your Tesla Wall Connector to Wi-Fi and enjoy remote charging control and monitoring.

")