Tesla is a leading manufacturer of electric vehicles, known for its innovative features and cutting-edge technology.
One of the most impressive aspects of a Tesla car is its built-in navigation system, which offers accurate directions, real-time traffic updates, and an impressive display to make your journey more enjoyable.
However, sometimes you may encounter issues with your Tesla navigation not working properly, which can be frustrating and inconvenient.
In this article, we will explore some of the common causes behind your Tesla navigation not working and offer practical solutions to get it up and running again.
Some of the common issues that users have faced with this navigation system are the faulty functioning of Tesla voice navigation, navigation stuck calculating, navigation system initializing for a long time, navigation no connectivity, navigation showing wrong location, or navigation not updating traffic information.
This can be frustrating and inconvenient, especially when you rely on the map to guide you to your destination or find the nearest superchargers.
In this article, we will explore some of the possible reasons and solutions for the Tesla navigation not working problem.
How to Fix the Tesla Navigation Not Working Issue?
If you encounter a Tesla navigation not working issue, you can try some of these solutions to fix it:
#1. Power Cycle the Vehicle
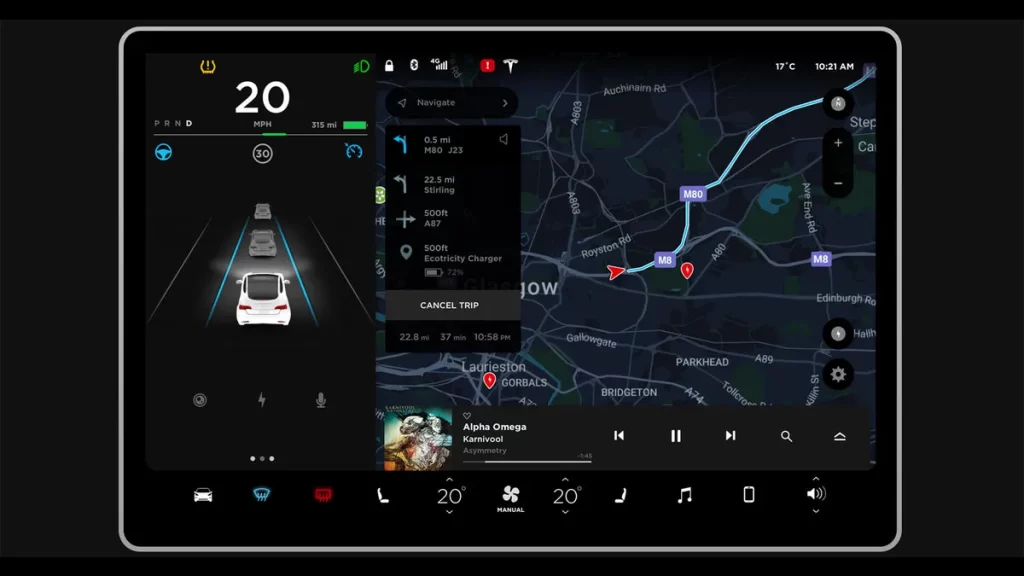
Powering down the vehicle can help reset system components. Navigate to ‘Controls’ > ‘Safety & Security’ > ‘Power Off’ and wait for at least two minutes without interacting with the car. Afterward, press the brake pedal to power the vehicle back on
#2. Update Navigation Software
Sometimes, a new firmware update can fix existing issues with the map and navigation system, or introduce new features and improvements.
You can check for firmware updates by going to Controls > Software > Check for Updates. You can also enable Advanced mode to receive updates faster.
If you are facing any problems with software updates, then read this article.

Check out these 20 great gift ideas for yourself or a Tesla fanboy.
Contact Us if you have any questions or queries.
#3 Check the Connection
Another possible solution is to connect the car to a Wi-Fi network, either at home or at a public hotspot.
This can allow the car to download any pending map data updates or GPS corrections that may improve the map screen functionality.
To prevent this from happening, you can avoid car washes that use this method, or cover the antenna with tape before entering them.
#4. Reset the Navigation Software
One of the simplest and most common solutions is to reboot the system by holding down both scroll wheels on the steering wheel until the touchscreen goes black and shows the Tesla logo.
This can clear any temporary software glitches or cache issues that may affect the map screen.
Here you can find tips on how to clear the cache and how to reboot Tesla.
#5. Calibrate Compass and GPS
If you notice discrepancies in the direction or orientation displayed on the map, recalibrating the compass and GPS can help.
This option can usually be found in the navigation settings menu. Follow the on-screen instructions to calibrate these components.
#6. Check and change the MCU fuse if needed
Find the MCU fuse (It is F51 in Model S/X) in the box with many fuses and take it out. Look at it carefully and see if it is broken or not.
If it is broken, then put a new fuse in its place. If it is not broken, then wait for 5 minutes and put it back where it was.
#7. Power off the car
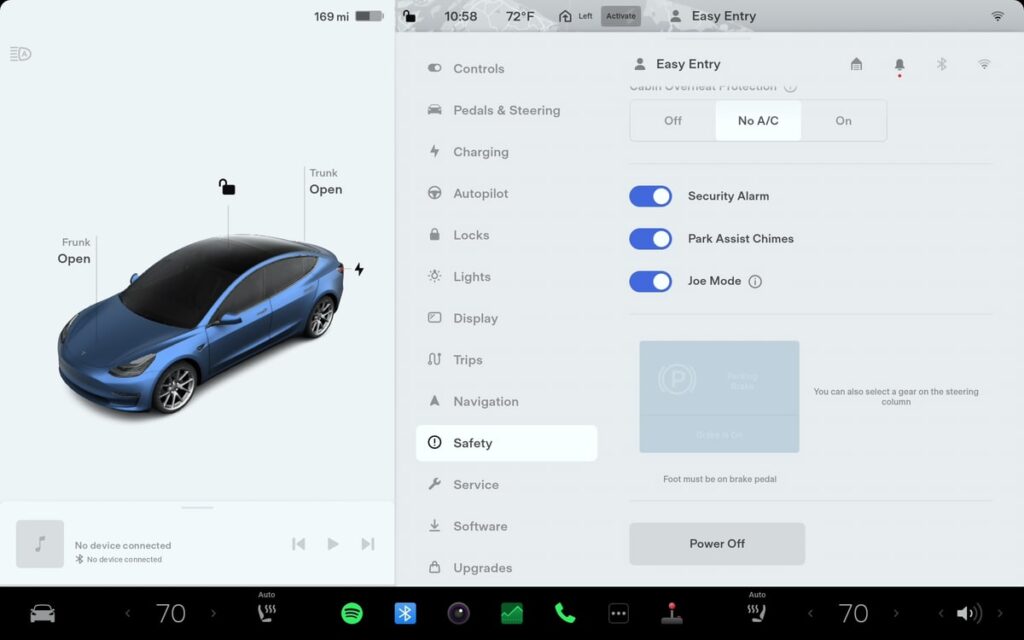
If rebooting or resetting the cache does not work, you can try to power off the car completely by going to Controls > Safety & Security > Power Off.
Then wait for 2-3 minutes before powering on the car again. This can reset the GPS signal and update the location.
#8. Hard Reset Your Tesla Software
Step 1: Open all the doors, windows, and trunks of your car.
Step 2: Go to the Controls menu on your dashboard and select Safety & Security. Then, tap on Power Off and confirm your choice.
Step 3: Exit your car and open the front trunk. Remove the battery cover and locate the battery terminals. They should be marked with red (+) and black (–) signs.
Step 4: Use a pair of pliers to disconnect the black (–) terminal first. Make sure it does not touch any other metal parts by placing a rag under it.
Step 5: Go back to the driver’s seat and find the latch between the seat and the carpet on both sides. Push the latch inward to release the seat.
Step 6: Lift the seat and remove the tire foam insulator. You should see a connector with a lock on it.
Step 7: Press down the lock and wait for one minute. Then, flip the lock-up to disconnect it.
Step 8: Put back the tire foam insulator and lower the seat. Make sure it is latched securely on both sides.
Step 9: Reconnect the black (–) terminal to the battery using the pliers. You should hear some sounds as your car resets and restarts.
Step 10: Replace the battery cover and close the front trunk.
Step 11: Test your car by turning it on and checking for any errors.
#9. Replace the Navigation SD Card in the Car’s Computer
If the micro SD card that holds the offline map data is corrupted or missing, a possible solution is to replace it with a new one.
Your card might not work or be broken. You can change your NAV SD card with the things you have in your garage.
To do this task, you’ll need some tools like a screwdriver, a new SD card with either 16 GB or 32 GB of storage, a screw gun, and some other basic stuff. Here are the steps in simple terms:
1 Use a pry tool (like the GOOACC 5PCS kit) to gently take off the plastic shields on both sides of the dashboard. Be careful not to break anything.
2. Next, remove the trim that goes around the front of the steering wheel. You can use the same pry tool, but you might need to use a bit of force if it’s stuck.
3. There are two screws on top of the steering wheel cover. Take those out.
4. Insert some air wedges into the plastic piece and pump them up a bit. This will make it easier to remove.
5. Now, use a screw gun or screwdriver to remove four screws from the air vent on the right side. This will give you access to the SD card compartment.
6. Take off the air vent.
7. There are six more screws holding the touchscreen in place. Use the screw gun to remove them.
8. Carefully pull out the touchscreen, and you’ll find the Nav SD card. Remove the old card and put in the new one using a pair of pliers.
9. Now, put everything back where it was. That’s it, you’re done!
#10. Use alternative navigation apps
If all else fails, you can use alternative navigation apps on your smartphone or tablet, such as Google Maps, Waze, Apple Maps, etc.
You can connect your device to your car via Bluetooth or USB cable, and use voice commands or touch controls to access them.
Why is Tesla navigation not showing the route?
The main reason why the navigation system may not show the route is that it is stuck when trying to initialize or calculate the route. This can happen due to poor GPS signals, network issues, or software glitches.
You can try to soft or hard reset the navigation system by holding down the scroll buttons on the steering wheel until the screen goes black and reboots.
This may help to clear any errors and restart the navigation system.
What To Do When Tesla Map Stuck on Calculating?
One common issue is that the navigation system keeps calculating the route repeatedly and does not show the blue line for the route.
This may be caused by a faulty navigation SD card in the MCU1. You can try to remove and replace the SD card or contact Tesla service for a warranty replacement.
Another possible issue is that the navigation system gets stuck on calculating the estimated time to the destination and does not update the location. This may be related to a software bug in the 2024.20.4.1 version.
You can try to do an infotainment restart by holding the steering wheel buttons until the center screen goes black and restarts. You may need to do this twice or more to fix the problem.
A third issue is that the GPS gets stuck or shows an incorrect location. This may be due to GPS signal interference or corrupted GPS data.
You can call Tesla support and they will send a GPS reset command to your car while you power off your car. Once you power back on, the GPS should work again.
Why is Tesla Map Not Loading or Displaying Blank Tiles?
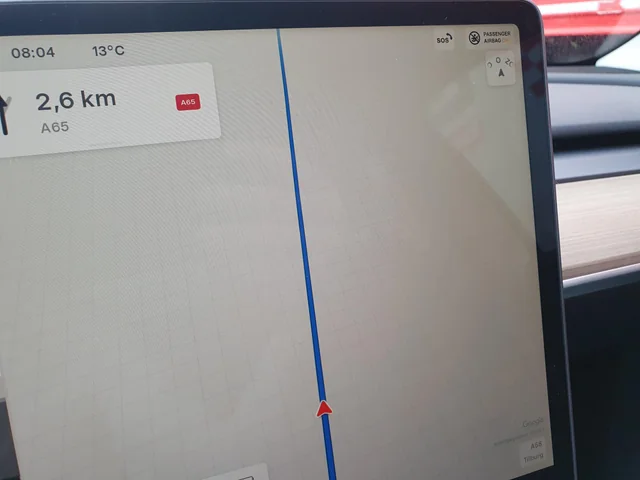
There could be several reasons why your Tesla map is not loading or displaying blank tiles.
Your internet connection may be slow or unstable, preventing your Tesla map from loading properly and displaying in a light background.
Your Tesla navigation system may have a bug or glitch that affects the map display.
To fix this, you can try to do a soft or hard reset of the navigation system, plug tightly or replace the GPS fuse, or change the Nav SD card in the MCU.
Some users have reported that the map won’t run inside the app and they get an error message that says map unable to load.
This could be due to a compatibility problem between the app and your phone model or operating system.
To fix this, you can try to clear the app cache and data, uninstall and reinstall the app, or contact Tesla support for assistance.
How to Keep Tesla Map Zoomed Out?
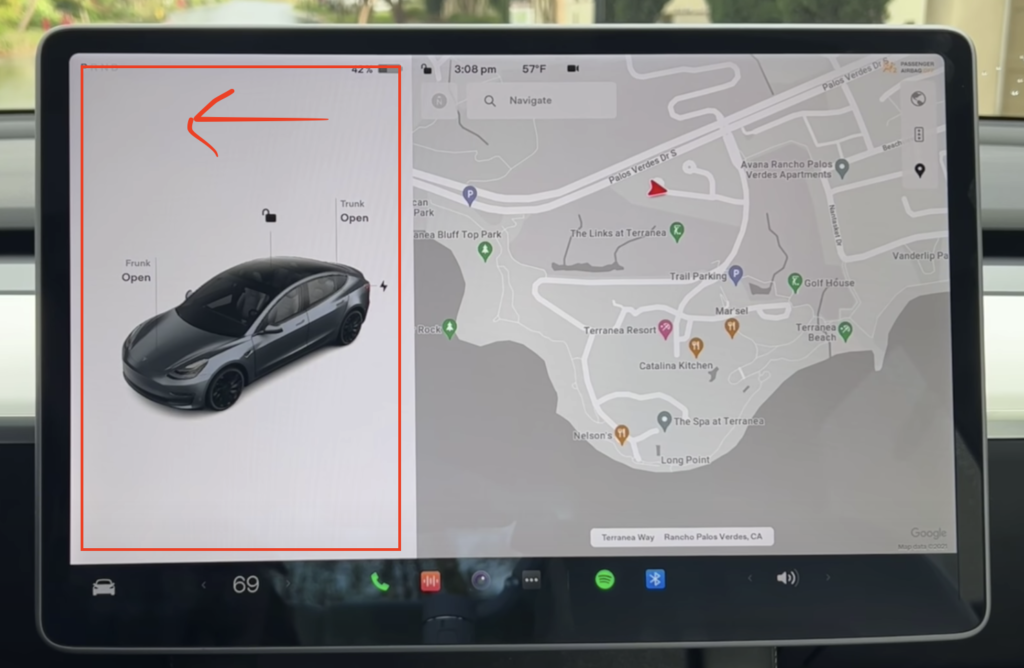
Unfortunately, there is no definitive answer to this question, as different Tesla models and software versions may have different behaviors and settings for the map zoom.
However, based on the web search results I found, here are some possible tips and tricks that might work for you:
1. Try double-tapping on the map to see if the +/- icons appear on the left side. You can use them to adjust the zoom level and maintain vehicle tracking.
2. Try pinching the map to zoom in or out. Some users reported that this does not disable tracking like it used to.
3. Try using voice commands such as “Zoom in/out on map” to change the zoom level without touching the screen.
4. Try switching between “north up” and “heading up” modes on the map. Some users noticed that the “north up” mode allows for more zooming in while tracking the car.
Why is Tesla map auto zoom not working or being too aggressive?
A less critical but still annoying issue that some Tesla owners have noticed is the map auto zoom not working or being too aggressive.
This can result in an inappropriate zoom level of the map that either shows too much or too little detail.
For example, one owner reported that his Model 3 map used to auto-zoom based on speed regardless of navigation but stopped doing so after an update.
Another owner said that his Model S used to auto-zoom too often based on speed and location but stopped doing so after an update.
Why is Tesla Navigation Not Working?
There are several factors that can affect the performance of Tesla map and navigation system, such as:
#1. A firmware update is Pending
Sometimes, a new firmware update can introduce bugs or glitches that affect the map functionality.
This can be resolved by waiting for a new update that fixes the issue, or by contacting Tesla support to request a rollback to a previous version.
#2. The GPS antenna is Damaged
The GPS antenna is located behind the rearview mirror, and it can be damaged or disconnected by external forces, such as a car wash, a collision, or vandalism.
This can result in no GPS signal or inaccurate location. This can be fixed by inspecting and reconnecting the antenna, or by replacing it if it is broken.
#3. Internet connection is lost
The map and navigation system relies on an internet connection to download map data and traffic information.
If the internet connection is weak or unavailable, the map may not load properly or show outdated information.
This can be improved by switching to a different network (such as Wi-Fi or cellular), or by moving to an area with better coverage.
#4. Cache data Causing the Issue
The map and navigation system stores some data in the cache memory to improve speed and performance.
However, sometimes the cache data can become corrupted or outdated, causing the map to malfunction.
This can be cleared by rebooting the system or resetting the cache.
#6. Corrupted or missing map data
The Tesla navigation system also stores offline map data on a micro SD card inside the MCU (media control unit).
This card can get corrupted or damaged over time, due to excessive write cycles or physical wear and tear.
If the card is corrupted or missing, the map screen may not load or show an error message.
#7. Software glitches
The Tesla navigation system is part of the car’s software, which can sometimes have bugs or glitches that affect its performance.
For example, some owners have reported that their map screen stopped working after a software update, or that their GPS location was inaccurate or frozen.
#8. Hardware issues
The Tesla navigation system also depends on hardware components, such as the GPS antenna, the MCU, and the touchscreen.
If any of these components are faulty or damaged, the map screen may not load or work properly.
What to do when Tesla navigation is stuck on calculating?
How to fix the Tesla navigation system initializing error?
Conclusion
Tesla’s map and navigation system is a great feature that enhances the driving experience and convenience of Tesla owners. However, it can sometimes malfunction or stop working due to various reasons.
In this article, we have discussed some of the possible causes and solutions for the Tesla navigation not working issue. We hope that this article has been helpful and informative for you.
If you have any questions or feedback, please feel free to contact us.


